Hello World In Kotlin

This tutorial walks us through creating a simple Kotlin application for Android.

It’s extremely easy to start using Kotlin for Android development. In this tutorial we’ll follow the warming up process with Android Studio. If you’re using Intellij IDEA with Android, the process is almost the same.

Creating a project

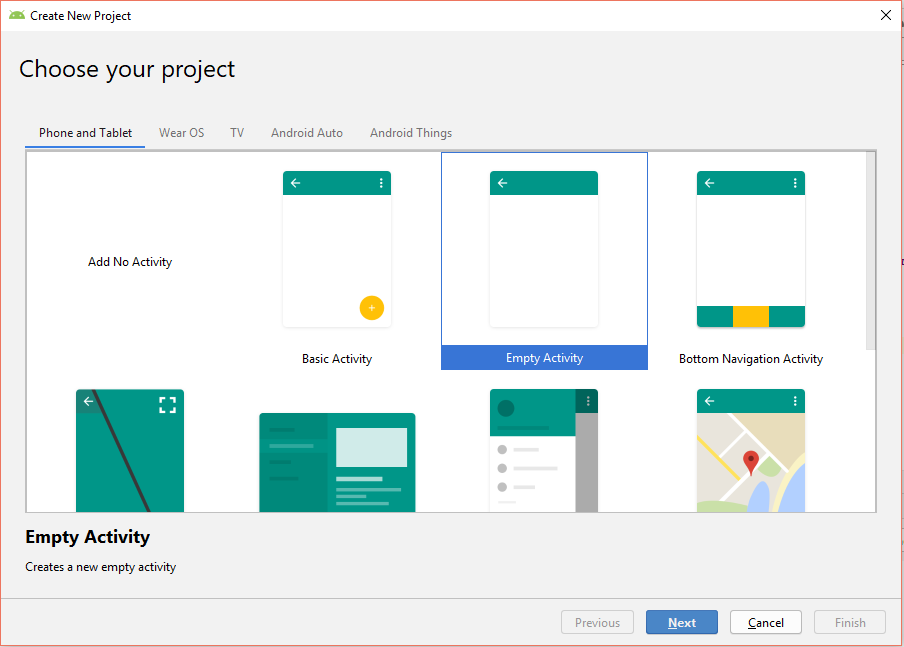
First, create a new Kotlin Android Project for your application:

  1. Open Android Studio and click Start a new Android Studio project on the welcome screen or File | New | New project.
  2. Select an activity that defines the behavior of your application. For your first “Hello world” application, select Empty Activity that just shows a screen, and click Next
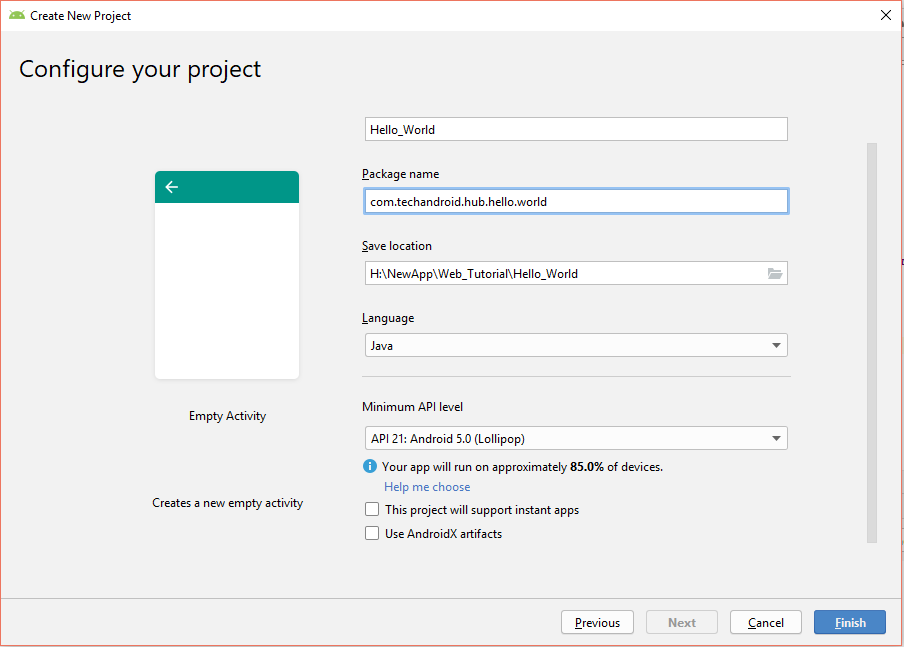
  3. In the next dialog, provide the project details:
  • name and package
  • location
  • language: select Kotlin

Leave other options with their default values and click Finish.

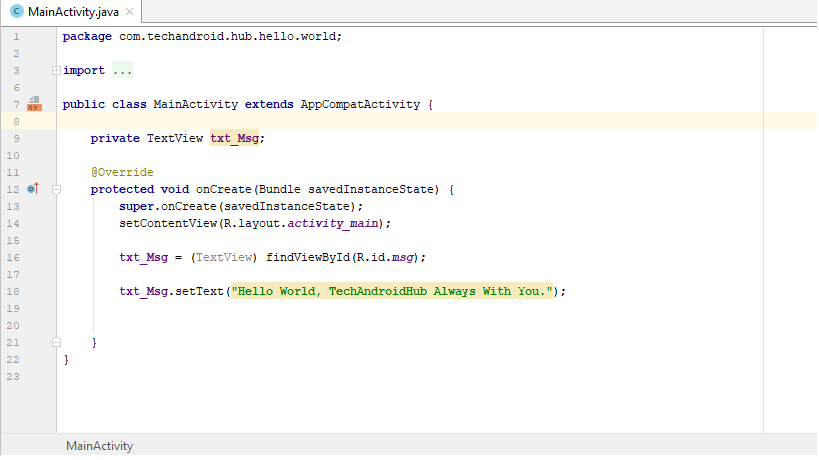
In this Application, We can implement both side. On Language side or in XML Side.

Below are Kotlin Code.

package com.hello.world.kotlin

import android.support.v7.app.AppCompatActivity
import android.os.Bundle
import android.widget.TextView

class MainActivity : AppCompatActivity() {

    lateinit var allHelloText: TextView

    override fun onCreate(savedInstanceState: Bundle?) {
        super.onCreate(savedInstanceState)
        setContentView(R.layout.activity_main)

        allHelloText = findViewById(R.id.hello_kotlin) as TextView
        allHelloText.setText("Hello Kotlin.... ")
    }
}

Below in XML Code

<?xml version="1.0" encoding="utf-8"?>
<android.support.constraint.ConstraintLayout
        xmlns:android="http://schemas.android.com/apk/res/android"
        xmlns:tools="http://schemas.android.com/tools"
        xmlns:app="http://schemas.android.com/apk/res-auto"
        android:layout_width="match_parent"
        android:layout_height="match_parent"
        tools:context=".MainActivity">

    <TextView
            android:id="@+id/hello_kotlin"
            android:layout_width="wrap_content"
            android:layout_height="wrap_content"
            android:text="Hello Kotlin...."
            app:layout_constraintBottom_toBottomOf="parent"
            app:layout_constraintLeft_toLeftOf="parent"
            app:layout_constraintRight_toRightOf="parent"
            app:layout_constraintTop_toTopOf="parent"/>

</android.support.constraint.ConstraintLayout>

So, This is the first project in Kotlin Language. Its easy and helpful for understand all the things.

Simple Listview In Android – Example

Now, We are publish of simple listview example in Android Studio.

In this example, We can give you simple introduction of Listview. It is basic example of Listview Tutorials.

This example use for beginner user who dont know about the android. It is simple example of Listview Tutorials.

Below are the code of the Simple Listview App.

First of all you have to create New Project which is called “Simple Listview” or anything else.

Now Below are the code of MainActivity.java

package com.web.simple.listview;

import android.support.v7.app.AppCompatActivity;
import android.os.Bundle;
import android.view.View;
import android.widget.AdapterView;
import android.widget.ArrayAdapter;
import android.widget.ListView;
import android.widget.Toast;

public class MainActivity extends AppCompatActivity {

    ListView lst_CountryName;
    // Defined Array values to show in ListView
    String[] worldValues = new String[]{"India",
            "United States",
            "Argentina",
            "Russia",
            "Australia",
            "Afghanistan",
    };

    @Override
    protected void onCreate(Bundle savedInstanceState) {
        super.onCreate(savedInstanceState);
        setContentView(R.layout.activity_main);

        // Get ListView object from xml
        lst_CountryName = (ListView) findViewById(R.id.listing);

        // Define a new Adapter
        // First parameter - Context
        // Second parameter - Layout for the row
        // Third parameter - ID of the TextView to which the data is written
        // Forth - the Array of data

        ArrayAdapter<String> adapter = new ArrayAdapter<String>(this,
                android.R.layout.simple_list_item_1, android.R.id.text1, worldValues);


        // Assign adapter to ListView
        lst_CountryName.setAdapter(adapter);

        // ListView Item Click Listener
        lst_CountryName.setOnItemClickListener(new AdapterView.OnItemClickListener() {

            @Override
            public void onItemClick(AdapterView<?> parent, View view,
                                    int position, long id) {

                // ListView Clicked item index
                int itemPosition = position;

                // ListView Clicked item value
                String itemValue = (String) lst_CountryName.getItemAtPosition(position);

                // Show Alert
                Toast.makeText(getApplicationContext(), " Click Country Name : " + itemValue, Toast.LENGTH_LONG)
                        .show();

            }

        });
    }
}

Now In XML File.

activity_main.xml

<!--?xml version="1.0" encoding="utf-8"?-->
<RelativeLayout xmlns:android="http://schemas.android.com/apk/res/android"
    xmlns:tools="http://schemas.android.com/tools"
    android:layout_width="match_parent"
    android:layout_height="match_parent"
    tools:context=".MainActivity">

    <ListView
        android:id="@+id/listing"
        android:layout_width="match_parent"
        android:layout_height="wrap_content" />

</RelativeLayout>

Now output of the project is given below.

Here is the screenshot.

Hello World Example – Android


In this tutorial, we show you how to create a simple “Hello World, TechAndroidHub Always With You.Android project in Android Studio.

All the Steps Given Below For develop android app easily.

First Install Android Studio.

First of all you have to download android studio to make android application.
You can easily download and it’s available to all the users freely without any further hectic steps.

Now Start Android Studio.

It will Open Wizard called Quick Start Under the Quick Start menu,

click on Start a new Android Studio project.

On the Create New Project window that will open project information wizard and by default it will give your application name to techAndroidHelloWorld.

then you need to add package name that might contain your company name. you can give name as desired. In our case we have provided package name: com.techandroid.hub.hello.world

then choose where you want to store your project. So choose your project location.

Click on Finish.

Now Project has been created. Now Its Automatically Open MainActivity.java File. If not then go to that Path – (app -> src -> main -> java – > (your package name) -> MainActivity.java file ) For Opening MainActivity.java

In this File, I put Textview For write some Message otherwise anything for your use.

Now, Hello World App is Finish Now. and Finally Run your App. And Final Result will be given bellow.

Download Source Code of this App Given Below.