First of all, Link building is still essential in today’s ever changing SEO landscape for increasing website authority and visibility. As search engine algorithms progress, so too do the tactics needed to create and preserve a strong link profile. Significant changes have occurred in the SEO scene in 2024, necessitating creative ways to link building. Let’s examine the most recent methods and trends influencing link building in the contemporary digital world.
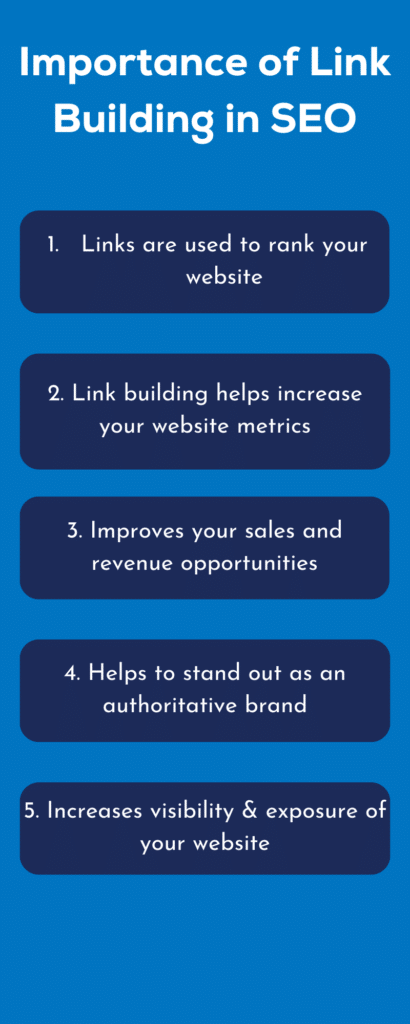
1. Comprehending the Function of Link Development Why is the importance of links to SEO? – How do search engines, such as Google, assess the authority and relevancy of websites based on links? – The effect of backlinks of superior quality on search engine rankings.
2. The Development of Link Building: – An review of the past, from early directory submissions to contemporary outreach initiatives.
The impact of Google algorithm changes on link-building strategies.
– The rise of link-building tactics focused on content and the fall of spam.
3. The current trends in link building emphasise the importance of context and relevance, arguing that quality is more important than quantity.
– The significance of acquiring links naturally: Developing connections and obtaining ties by default.
– Including interactive, video, and infographic information in multimedia acquisition efforts.
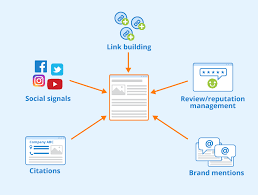
– Using social media to create links: Using communities and influencers to spread material.
4. Creative Connection-Building Techniques for 2024:
– Collaborative content creation: Creating authoritative content by collaborating with professionals and industry influencers.
– Data-driven outreach: Linking prospects and personalising outreach activities with the use of analytics and research.
Using user-generated content to promote user engagement and create organic backlinks.
– Local link-building strategies: To improve local SEO efforts, focus on local organisations, events, and directories.
5. Resources and Tools for Powerful Link Development:
– Outreach automation tools: These technologies streamline relationship management and outreach campaigns.
– Backlink analysis tools: Evaluating the quality of current backlinks and pinpointing areas in need of development.
– Platforms for content development: Enabling the creation of captivating and distributable content types.
– Social media management tools: keeping an eye out for brand mentions and interacting with communities that matter.
6. Guidelines and Best Practices: – Keep your link profile diverse. Maintain a balance between the various kinds of links, such as citations, guest pieces, and editorials.
– Give authority and relevance priority: Give links coming from websites with a lot of subject and domain authority priority.
– Keep an eye on the health of links: Audit backlinks frequently to find and disavow harmful links that could lower rankings.
– Keep abreast of market developments: Modify link-building tactics in response to algorithm changes and new developments.
link building is still essential to gaining online visibility and authority in the always changing field of SEO. Businesses may successfully manage the challenges of link building in 2024 and beyond by knowing the most recent trends, putting creative methods to use, and employing the appropriate technologies. adopting a comprehensive strategy that puts user engagement, relevance, and quality first
This bit of Kotlin code:
1. We import the required classes from the Android framework, `Intent` and `Uri`.
2. A function called `openUrlInBrowser` is defined, and it accepts a URL as a string parameter.
3. We build a `Intent} within the function using the `ACTION_VIEW` action and a `Uri} that is parsed from the URL.
4. We initiate the `Intent}-related activity, which usually opens the URL in a web browser.
import android.content.Intent
import android.net.Uri

// Function to open a URL in a web browser
fun openUrlInBrowser(url: String) {
    val intent = Intent(Intent.ACTION_VIEW, Uri.parse(url))
    startActivity(intent)
}

// Example usage
val link = "https://www.example.com/link-building-in-seo-2024"
openUrlInBrowser(link)
In this Kotlin code snippet:
- We import necessary classes
IntentandUrifrom Android framework. - We define a function
openUrlInBrowserthat takes a URL as a string parameter. - Inside the function, we create an
IntentwithACTION_VIEWaction and aUriparsed from the URL. - We start the activity associated with the
Intent, which typically opens the URL in a web browser.
This code can be included into your Android app anywhere you’d like to have a URL to a webpage, like as a text view or button click listener. Simply enter the URL you wish to link to in place of the `link` variable.