Linearlayout Example In Android

Android’s LinearLayout, a versatile ViewGroup subclass, offers developers an efficient and intuitive way to arrange child View elements in a linear fashion. You can check Linearlayout Example in Android Project.

By leveraging the orientation property, LinearLayout facilitates seamless organization of child views either horizontally or vertically. With its ability to create single or multi-row, multi-column layouts, LinearLayout proves to be an indispensable tool for crafting dynamic and visually appealing user interfaces.

All the child elements arranged one by one in multiple rows and multiple columns And you can create Userfriendly UI.

Horizontal list: One row, multiple columns.
Vertical list: One column, multiple rows.

Advantages of LinearLayout:

  1. Simplicity: LinearLayout provides a straightforward and intuitive approach to arranging child views in a linear manner, reducing the complexity of UI development.
  2. Flexibility: Developers have the freedom to adjust the orientation as needed, allowing for adaptable and responsive layouts based on the specific requirements of the application.
  3. Dynamic Layouts: LinearLayout enables the creation of dynamic UIs by dynamically adding or removing child views at runtime.
  4. Efficient Resource Utilization: LinearLayout consumes minimal system resources, ensuring smooth performance and efficient memory management.

Implementation in XML:
To utilize LinearLayout, define it in XML layout files using the following syntax:

<LinearLayout
    xmlns:android="http://schemas.android.com/apk/res/android"
    android:layout_width="match_parent"
    android:layout_height="match_parent"
    android:orientation="vertical">

    <!-- All Child views here -->

</LinearLayout>

Android’s LinearLayout empowers developers to effortlessly create dynamic and well-structured user interfaces.

Its ability to arrange child views linearly, either horizontally or vertically, provides the foundation for crafting visually appealing and user-friendly layouts.

You can also check Edittext Example and Textview Example layout on XML File.

Practical Usage Scenarios:

  1. Navigation Bars: LinearLayout simplifies the construction of horizontal or vertical navigation bars, ensuring consistent spacing and alignment of navigation elements.
  2. Form Input Fields: By organizing form input fields vertically, LinearLayout enhances user experience and readability.
  3. Image Galleries: By implementing a horizontal LinearLayout, images can be arranged side by side, creating visually appealing image galleries.

With LinearLayout’s simplicity, flexibility, and efficiency, developers can optimize resource utilization while delivering an exceptional user experience. By harnessing the power of LinearLayout, developers can unlock the potential for innovative and intuitive UI designs.

Cardview In Androidx – Material Design

There are so many properties in Android Material Design. In this tutorial we discuss about cardview. In Material Design Cardview we can design so many things at creative way.

Cardview – It is a material design component in 2014. It is very easy to use and understand for android developers. The main pupose of cardview is a looking good interface in Listview and all other feature like images and text. You can also changed some color in cardview with allegant background and use in proper manner.

How to Implement Cardview in Android App?

First of all you have to add cardview support library in your build.gradle file. And then click on sync button in Android Studio. So After successfull added you can use cardview on your app. Below code of support library.

implementation 'androidx.cardview:cardview:1.0.0'

Now you can add cardview in your XML File.

<androidx.cardview.widget.CardViewxmlns:android="http://schemas.android.com/apk/res/android"
    xmlns:card_view="http://schemas.android.com/apk/res-auto"
    android:id="@+id/card_Data"
    android:layout_width="match_parent"
    android:layout_height="match_parent">

Now there are so many properties of cardview.

Give Effect of Cardview clickevent. Code given Below

android:clickable="true"
android:foreground="?android:attr/selectableItemBackground"

if you want to change cardview background color then use this code for the cardview.

card_view:cardBackgroundColor="#FFF" // (XML)

In JAVA

cardView.setCardBackgroundColor(Color.WHITE); // (JAVA)

Give Cardview Corner shape. Use this code

card_view:cardCornerRadius="7dp" // (XML)

In JAVA

[php] cardView.setRadius(0); // (JAVA) [/php]

If you want to give elevation of cardview. Then use this code

[php] card_view:cardElevation=”7dp” // (XML) [/php]

In JAVA

[php] cardView.setCardElevation(2.1f); // (JAVA) [/php]

Give content padding in cardview. Use below code.

[php] card_view:contentPadding=”7dp” // (XML) [/php]

In JAVA

[php] cardView.setContentPadding(30, 30, 30, 0); // (JAVA) [/php]

Wave Design Template Android App

Highlights of App:

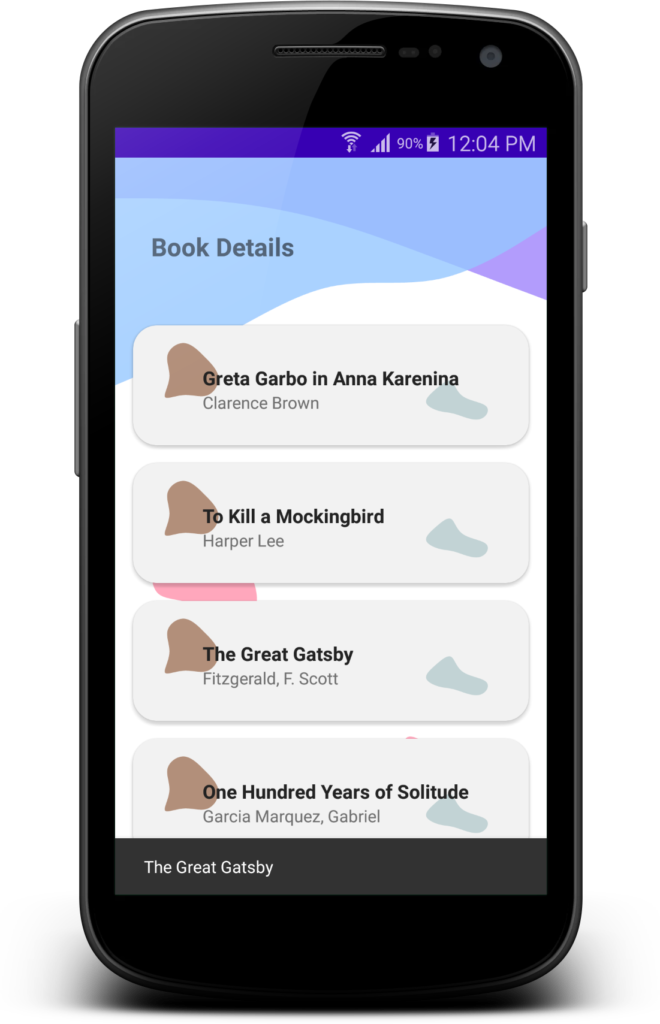
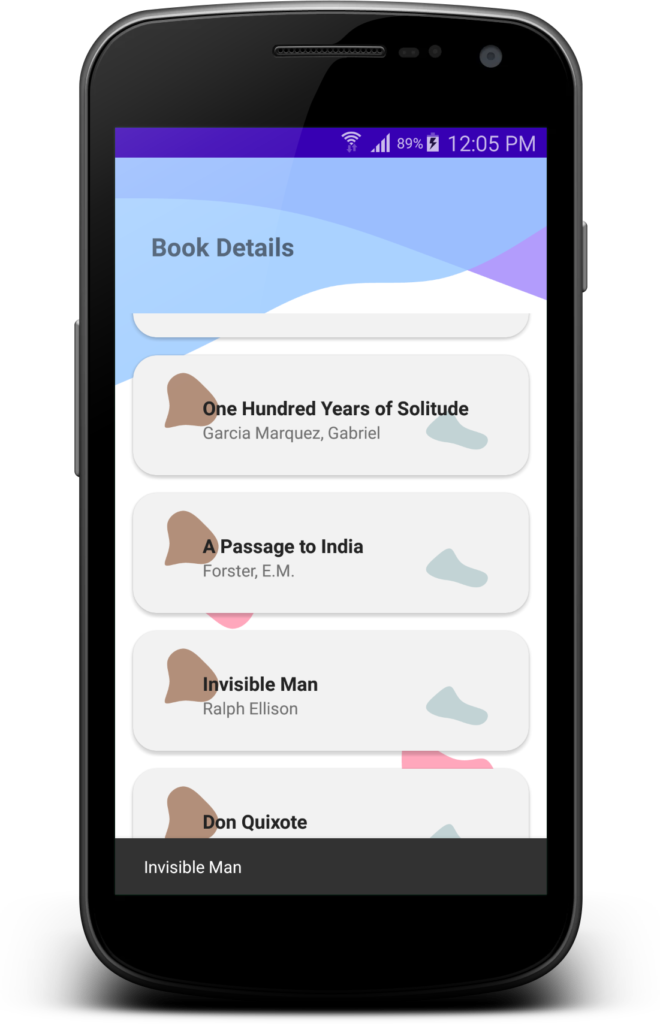
Wave Design Application is a Android Mobile Application. It has really clean and eye-catching interfaces with a perfect color scheme. In this App, I developed this

template for Android Developer who can develop waves android mobile application. It is very clear des‌ign of waves app.

In that App, I developed Cardview, RecycleView, XML Design of that App, Custom Adapter of Recycleview, Click Event of Cardview, Snackbar. Also Added Waves design and

Blob Design for New Interface of this App. So In that things So many feature we can develop on your App.

Screenshot of the App :

Wave Design Apk :

https://www.dropbox.com/s/2sma1nn4zlzaenq/Wave_Design_V1.apk?dl=0

I hope you can check this APK and Buy this project for create your projects.

Hello World Example – Android


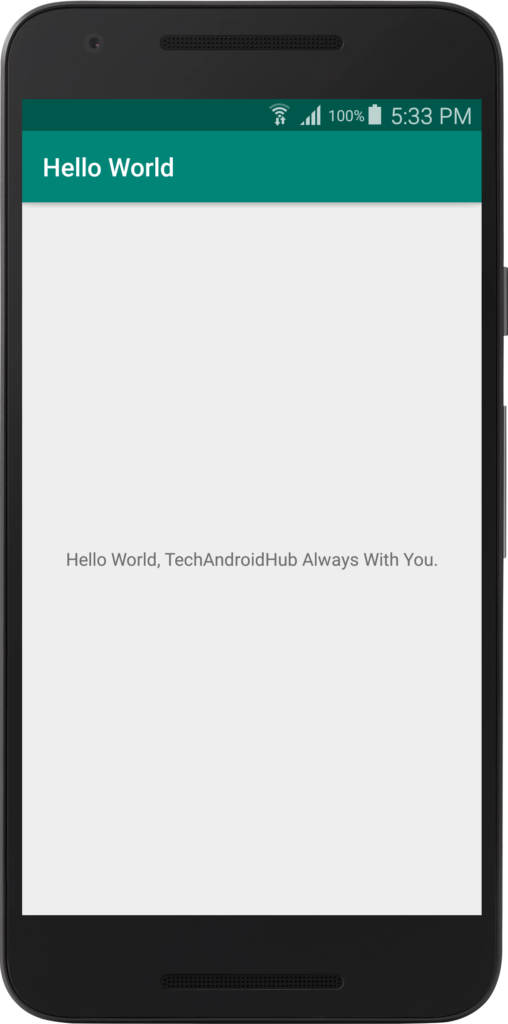
In this tutorial, we show you how to create a simple “Hello World, TechAndroidHub Always With You.Android project in Android Studio.

All the Steps Given Below For develop android app easily.

First Install Android Studio.

First of all you have to download android studio to make android application.
You can easily download and it’s available to all the users freely without any further hectic steps.

Now Start Android Studio.

It will Open Wizard called Quick Start Under the Quick Start menu,

click on Start a new Android Studio project.

On the Create New Project window that will open project information wizard and by default it will give your application name to techAndroidHelloWorld.

then you need to add package name that might contain your company name. you can give name as desired. In our case we have provided package name: com.techandroid.hub.hello.world

then choose where you want to store your project. So choose your project location.

Click on Finish.

Now Project has been created. Now Its Automatically Open MainActivity.java File. If not then go to that Path – (app -> src -> main -> java – > (your package name) -> MainActivity.java file ) For Opening MainActivity.java

In this File, I put Textview For write some Message otherwise anything for your use.

Now, Hello World App is Finish Now. and Finally Run your App. And Final Result will be given bellow.

Download Source Code of this App Given Below.